
Mautic has now graduated from beta as an official Zapier app, meaning anyone with a Zapier account can include Mautic in their Zaps with 1,000+ other applications. Zaps empower non-technical users to integrate Mautic and push data back-and-forth between applications from different vendors, without writing a single line of code.
Do you ever wish you could free up your time from manually exporting, then importing CSVs between apps? Or perhaps you run an e-commerce website with Shopify or WooCommerce, and want to push the buyer details into Mautic to follow up with them? The possibilities are endless when you can create & update contacts in Mautic based on other apps, or vice versa.
Zapier integrates with popular apps including Google Sheets, Gmail, Slack, and Facebook Lead Ads. You can even build a multi-step zap where you collect a new lead from Facebook Lead Ads, create a contact in Mautic, then notify a sales person through Slack.
Pushing & pulling contacts between Mautic and CRMs, such as SugarCRM, HubSpot CRM or Zoho is also a popular use case for zaps. Using Zapier to “drag and drop” actions into a Zap can be simpler than mapping the contact fields for Mautic plugins that provide bi-directional integration with CRMs. You can keep any new and updated contacts synced between Mautic and a CRM by creating multiple Zaps like this:
Push from Mautic to SugarCRM (Trigger from Mautic)
- Find or create record in SugarCRM 7+ when new contact in Mautic
- Update record in SugarCRM 7+ when updated contact in Mautic
Pull from SugarCRM to Mautic (Trigger from SugarCRM)
- Create or update contact in Mautic when new record in SugarCRM 7+
- Create or update contact in Mautic when updated record in SugarCRM 7+
Zapier plugs into the Mautic API of any self-hosted Mautic instance by authenticating over OAuth as an Administrator user. The Mautic instance should have an SSL certificate installed and be served over HTTPS to ensure no passwords nor contact data is transmitted insecurely.
When we last wrote about Mautic on Zapier it was in private beta for Mautic 2.3, requiring an invitation link to access. John Linhart, a software engineer at Mautic, now maintains the mautic-zapier repo, which is updated from time-to-time for compatibility with the latest versions of Mautic. Here is how we connected Zapier with the latest version of Mautic at the time of this writing, 2.15.1.
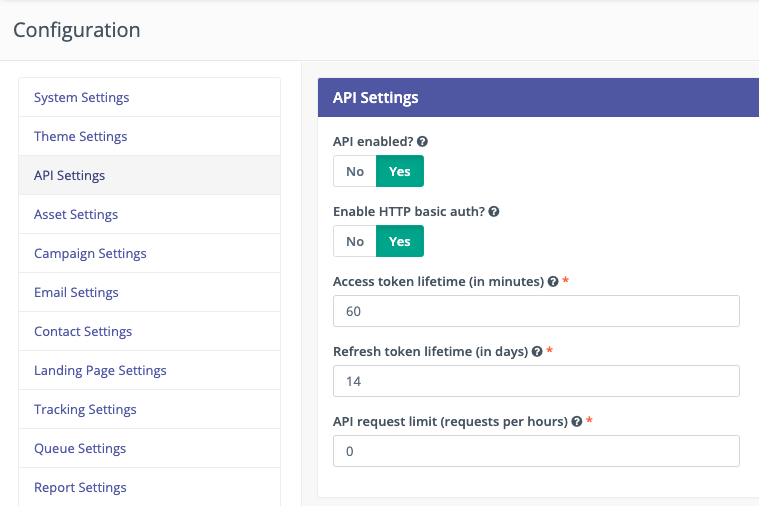
Enable the Mautic API.
Setting up Zapier doesn’t actually require you to install any plugin on your Mautic instance. You will however need to enable API access in Configuration > API Settings, and clear your Mautic cache so the change takes effect.
The Mautic cache can be cleared by deleting the contents of app/cache (but not the folder itself) through FTP, or running the following SSH command from the Mautic folder. If you delete everything in app/cache, remember to download the IP lookup table again through Configuration > System Settings, otherwise further leads won’t be associated with a city and country.
sudo -u <apache user> app/console cache:clear

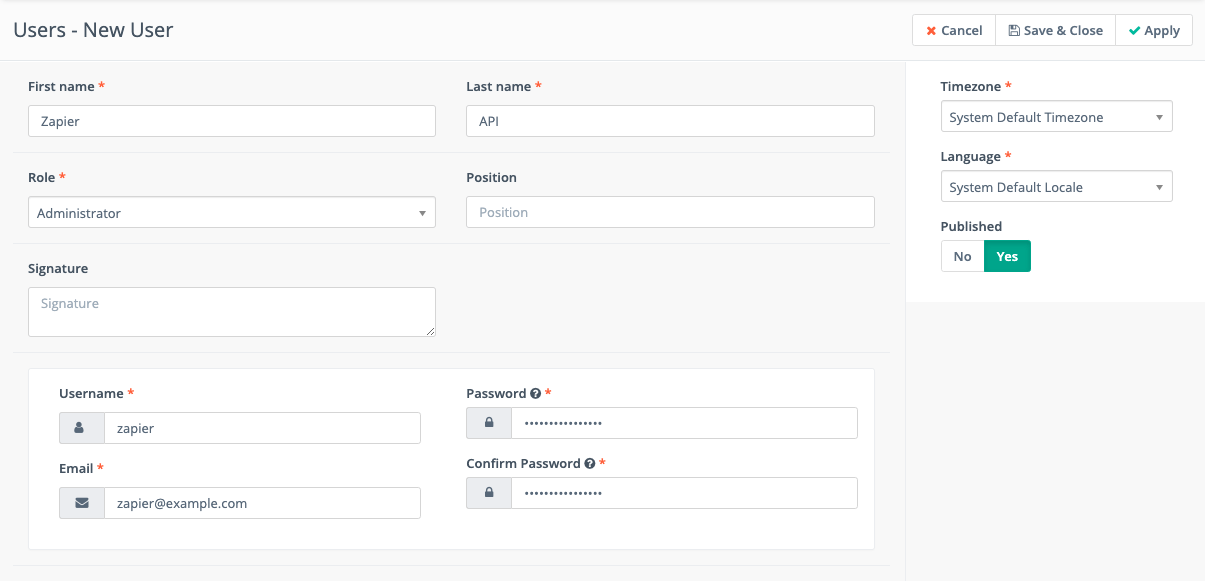
Create Zapier user account in Mautic.
Add a separate user account just for Zapier in the Users pane. It is recommended to use a different password than the one on your primary Mautic account. The Role should be “Administrator” and the Email address should be unique from any other Mautic account. No emails will actually be sent to this user so zapier@example.com is fine.

Register or sign in to Zapier.
Now create a user account at Zapier if you don’t already have one, verify your email address, then sign in.
Create your first zap between Mautic and another app.
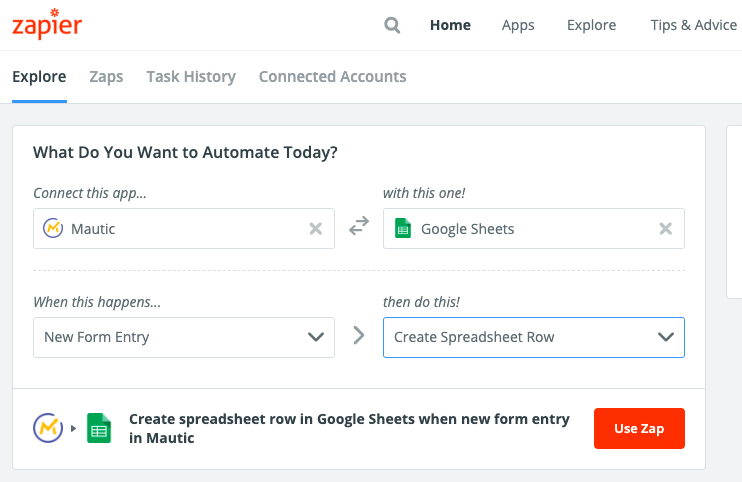
Choose the other app you want to integrate with Mautic. For simplicity we will use Google Sheets, and create a zap that is triggered by a new form entry in Mautic. This zap will append a row to the Google spreadsheet with the responses whenever one is received from a specified Mautic form.
Click “Use Zap” to continue.

Connect Zapier to Mautic and test the connection.
In the next step you will be requested to connect the Mautic instance to Zapier. Click “Connect an Account” when prompted, and a pop-up window will appear asking for your Mautic Username, Password, and Base URL.
The Username should be “zapier” and the Password was set in the previous step. The Base URL of your Mautic instance corresponds with the address you use to sign in to your Mautic dashboard (https://mautic.example.com, for example).


Click “Yes, Continue” to connect Mautic and Zapier.
Once the pop-up closes and you are returned to the Zap creation wizard, click “Test” to ensure Zapier can communicate with the Mautic API. If successful, it should “Success!” in green. Otherwise, ensure you have cleared your Mautic cache after enabling API, check your credentials and try again.
Note that the version number in brackets corresponds to the version of mautic-zapier, not the version of your self-hosted Mautic instance.

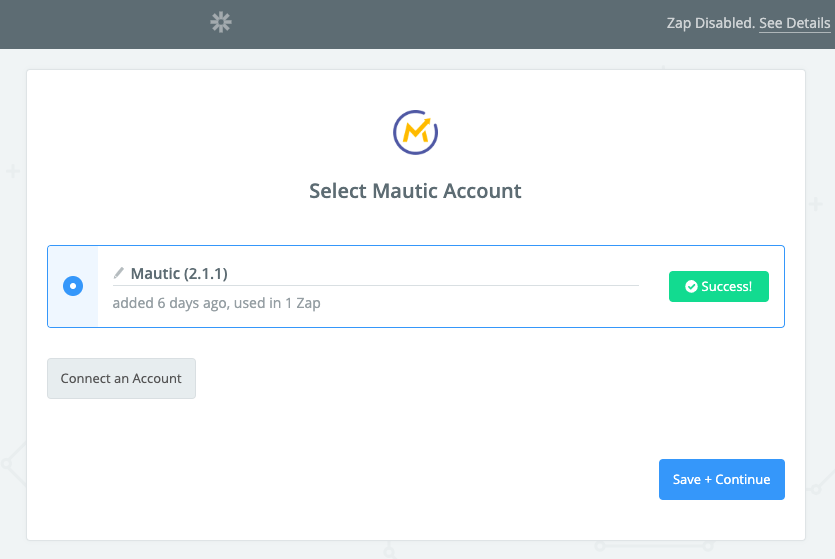
Click “Save + Continue” to proceed.
Edit the first step in your Zap (Mautic “New Form Entry”).
The first step in this Zap will be “New Form Entry” trigger in Mautic. The difference is “New Form Entry” triggers upon submission of a specific Mautic form (even if the contact already exists) while “New” or “Updated Contact” triggers whenever a contact is created or updated by any Mautic form. Imports via CSV, or changes directly made to a contact via the dashboard also cause the Zapier actions triggered by “New” or “Updated Contact” to fire.
Select the Mautic form you wish to associate with this Zapier Zap from the drop-down, then click “Continue.”

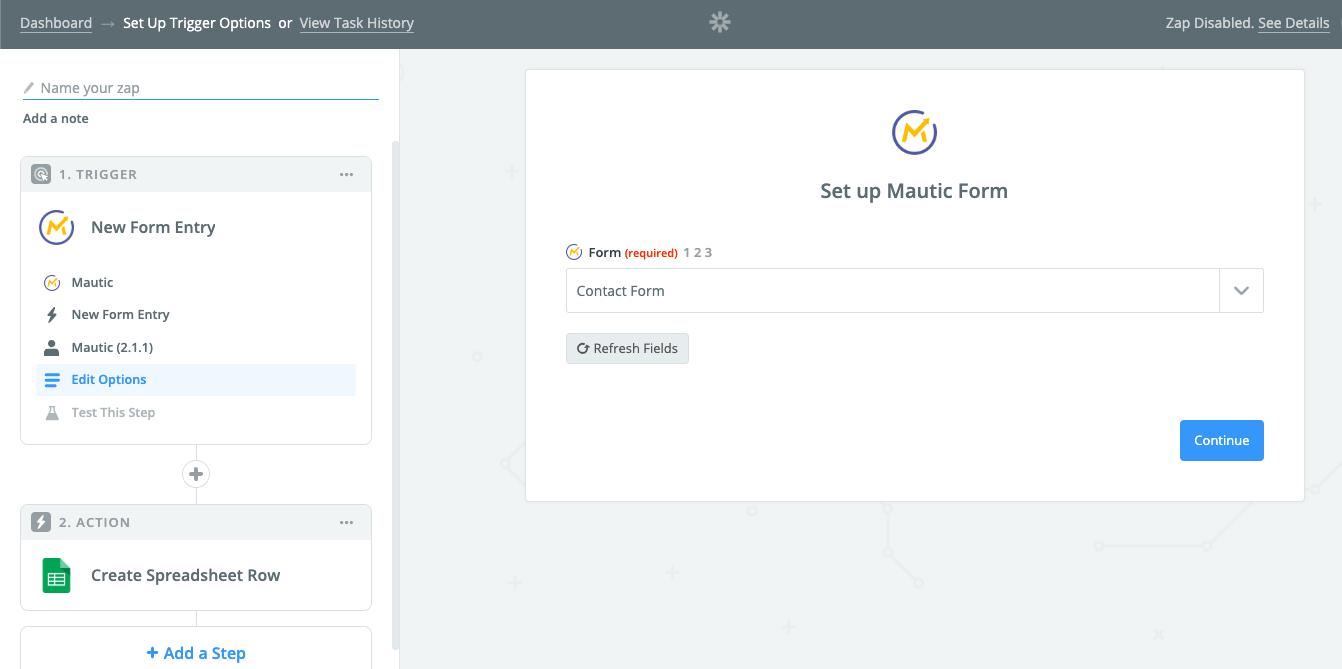
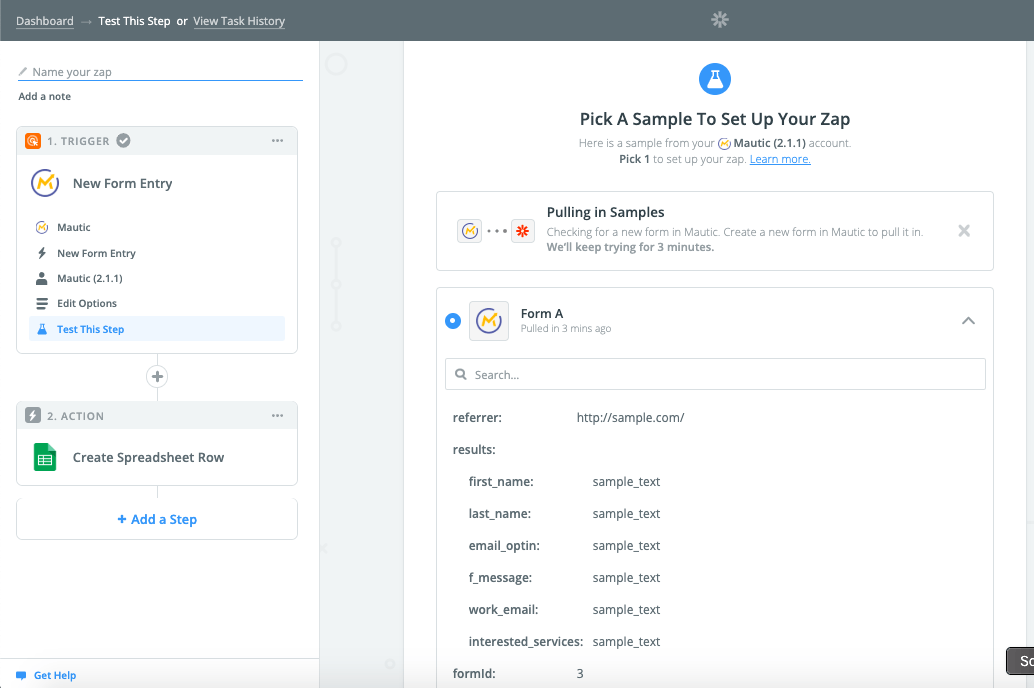
The next stage labelled “Pick a Sample to Set Up Your Zap” will pull in an example form submission from the form you specified, so you can check the necessary form fields are present. Click “Get More Samples” or “Continue” to proceed once you are satisfied.

Edit the second step in your Zap (Google Sheets “Create Spreadsheet Row”)
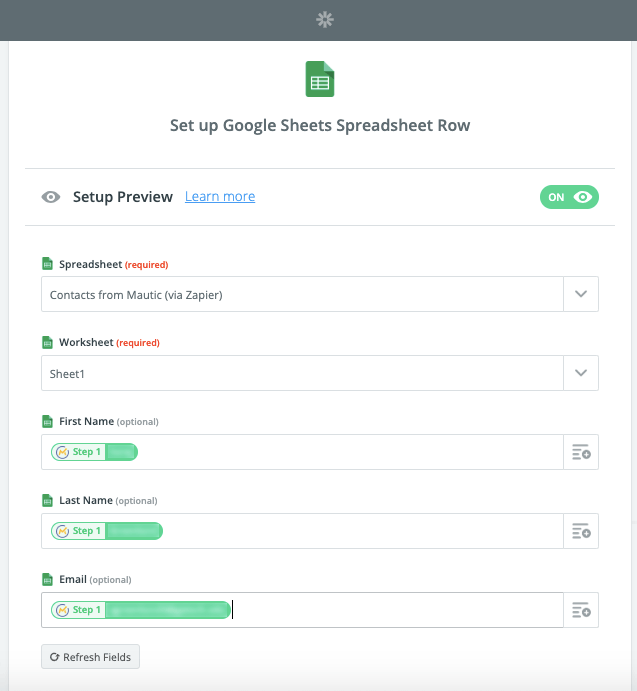
Create a new spreadsheet in Google Sheets to house the entries pushed over from Mautic through Zapier, if you haven’t already. Also, create column headers corresponding to any data fields you plan to push into the spreadsheets, such as “First Name”, “Last Name”, “Email.”
It is not mandatory to include all the fields from your Mautic form, just the ones you would like to sync over to Google Sheets.


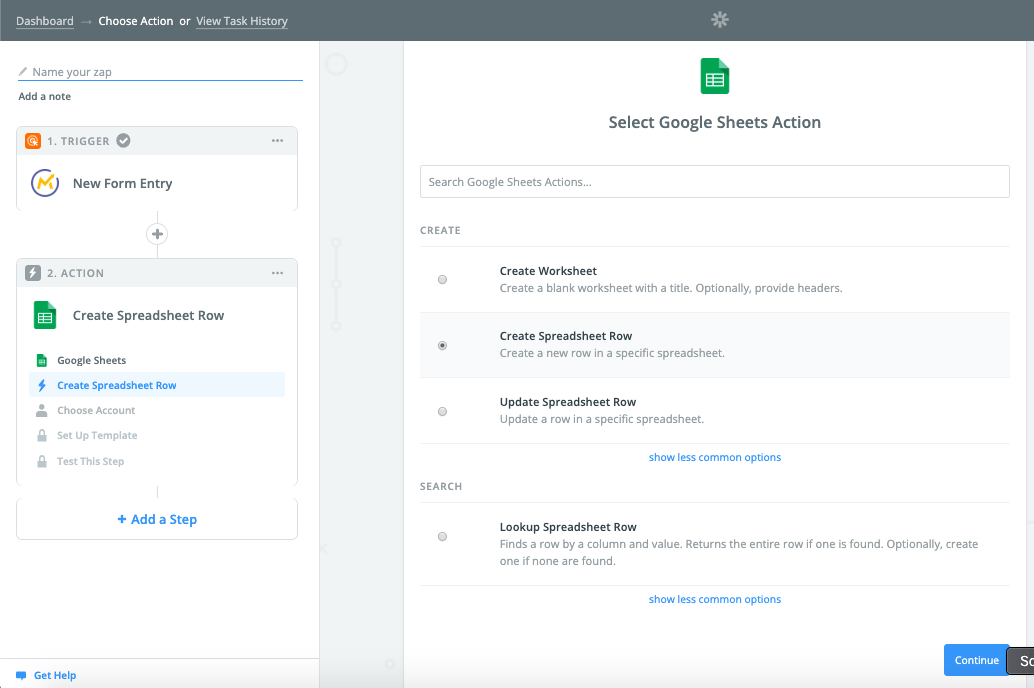
Choose “Google Sheets” as the app in the Action step of the Zap, then select the “Create Spreadsheet Row” radio button from the list of possible actions.

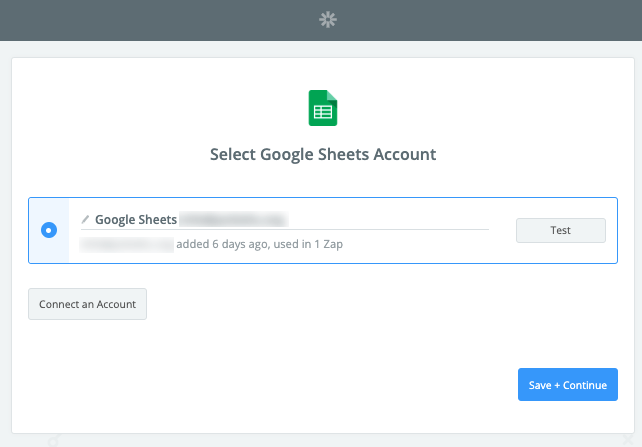
Next, connect your Google account using “Connect an Account” and authenticate with your Google username and password in the pop-up which appears. Click “Save + Continue.”

Finally, select the name of the Google spreadsheet you created from the drop-down, and the Sheet which Zapier should append data into (by default, the first sheet is called Sheet1). Also, map each Mautic form field to the corresponding columns in the spreadsheet.

In the next step, you can test the Zap by clicking “Send Test to Google Sheets.” On success, a message “A Test spreadsheet row was sent to Google Sheets” will appear.

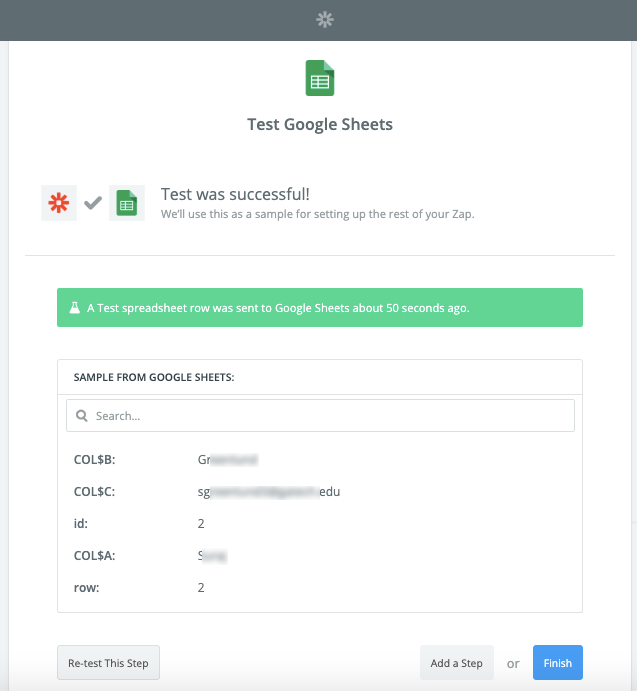
You can also verify the test was successful by viewing the Google Sheet directly. All of the fields we associated with the Zap through Zapier have been pushed over to the spreadsheet.


Click “Finish” to save your progress and proceed to enabling the Zap.
Name the Zap, and switch the “Your Zap is Off” toggle to “On.”

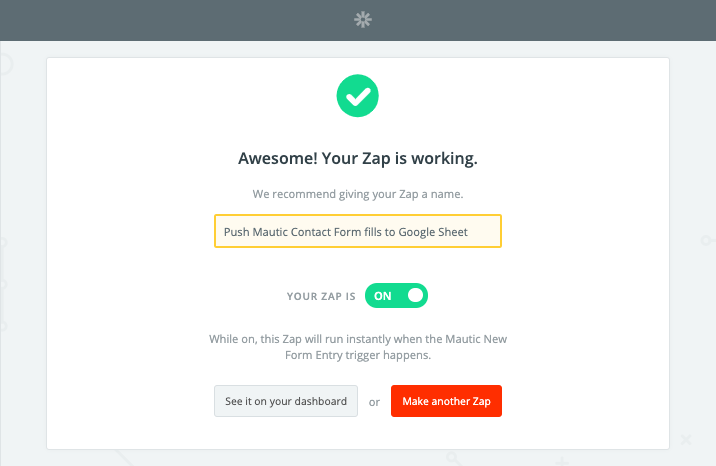
Congratulations, you’re all done and have made your first Zap to integrate other Zapier applications with Mautic.