Marketing Automation Hosting Tutorial
Post-Install Mautic Setup
 Once you’re done installing Mautic, you’re almost ready to set up your marketing campaigns. There are still a few steps to ensure all the features of Mautic, including segments, campaigns, reports and email delivery work. Most importantly, you need to install the Mautic tracking pixel to track visitor and lead activity on your website. With some basic know-how, it isn’t difficult to get your Mautic instance fully up and running.
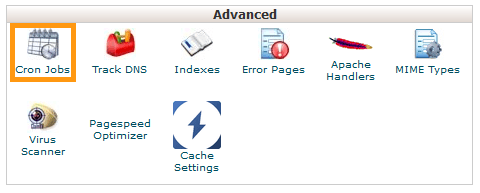
Cron Jobs
Cron jobs are scheduled tasks on a Linux server, much like the Scheduled Tasks you would set up on a Windows machine to do regular virus scans, backups and maintenance. Mautic relies on a three or four (if you’ve enabled email queuing) cron jobs to keep your segments and campaigns up to date.
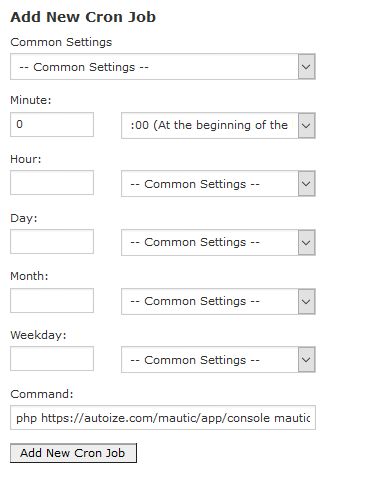
You can set up cron jobs graphically through cPanel, or directly in the shell if you have SSH access to your server. The Mautic team recommends running each cron job four times per hour, at 15 minute intervals. For best results, you should stagger the intervals for each cron job so they don’t all run at once and bog down your available CPU and RAM.
For example, you might set up the first cron to run at 0, 15, 30, 45 (every 15 minutes, beginning on the hour), the second one at 5, 20, 35, 50 (beginning 5 minutes past the hour) and the third to run at 10, 25, 40, 55 (beginning 10 minutes past the hour).
Updating Contact Segments
php /path/to/mautic/app/console mautic:segments:update
Update Campaigns
php /path/to/mautic/app/console mautic:campaigns:rebuild
Execute Campaign Actions
php /path/to/mautic/app/console mautic:campaigns:trigger
Fetch and Process Monitored Email (if using Bounce Management)
php /path/to/mautic/app/console mautic:email:fetch
Social Monitoring
php /path/to/mautic/app/console mautic:social:monitoring
Process Email Queue (if email queuing is enabled)
php /path/to/mautic/app/console mautic:emails:send
For an simpler, visual way to set up cron jobs for your Mautic instance, you can download the Cronfig.io plugin by John Linhart, one of Mautic’s core developers. Via the Mautic API, Cronfig is a Mautic plugin that remotely triggers up to 3 cron jobs on your Mautic instance every 30 minutes on the free plan (Premium plans coming soon).
With Cronfig, you don’t need to figure out the correct path to your webhost’s PHP library, nor edit any config files. Beginners should certainly check out the tool; but if you have a high traffic website that needs to run Mautic’s maintenance tasks more frequently, or if you are using other Mautic features (e.g. social monitoring) that require cron jobs in addition to segments and campaigns, setting cron jobs up manually might be better.
Set up Tracking Pixel or JavaScript
Like most marketing automation platforms, Mautic requires tracking code to be implemented on your website to track visitor and lead activities. You have a choice between two different types of tracking code with Mautic: an 1×1 image based pixel or JavaScript snippet.
By default, most Mautic users go with the tracking pixel. The JavaScript snippet bears a lot of resemblance to the Google Analytics tracking code — as you might expect, it only works on visitors’ browsers who have JavaScript enabled. Both formats will cookie the user, identify their IP address and pull their pageviews, email views, clicks and form submissions into Mautic for reporting and automation purposes.
Tracking Pixel
<img src="http(s)://yourdomain.com/path/to/mautic/mtracking.gif" />
If you use WordPress, Drupal or another supported CMS, you can install a plugin or module that will automatically embed the tracking pixel into each page of your website. For a static website or on other platforms, you should include the tracking pixel in the footer, before the closing </body> tag of your templates.

JavaScript Code
<script>(function(w,d,t,u,n,a,m){w['MauticTrackingObject']=n; w[n]=w[n]||function(){(w[n].q=w[n].q||[]).push(arguments)},a=d.createElement(t), m=d.getElementsByTagName(t)[0];a.async=1;a.src=u;m.parentNode.insertBefore(a,m) })(window,document,'script','http(s)://yourdomain.com/path/to/mautic/mtc.js','mt'); mt('send', 'pageview'); </script>
Download IP Lookup Database
Finally you will want to install the MaxMind IP Lookup Database. If you’ve worked in e-commerce or financial services, you might be familiar with MaxMind. They’ve compiled the one of the largest databases of IP addresses by geolocation, fraud risk and proxy status. For your Mautic installation, MaxMind has a free GeoIP Lookup Database which will give you down to city-level location for each visitor to your website.
Even anonymous or unidentified leads, who haven’t entered their email address yet, can be narrowed down geographically — giving you insight whether you’re attracting the right traffic from your target market(s) and what emerging markets might be.
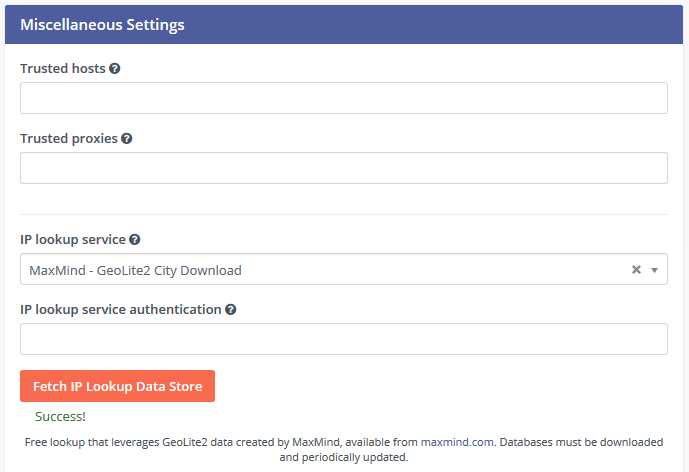
Click on the “gears” icon at the top right corner of your Mautic dashboard, then select Configuration in the pane that appears. Under System Settings > Miscellaneous Settings, you will find IP Lookup Service.
Select “MaxMind – GeoLite2 City Download” in the dropdown and click “Fetch IP Lookup Data Store” to download the free version of MaxMind’s database into your instance of Mautic. The other free option is Freegeoip.net, which is a lookup service based on the GeoLite2 database. With the download version, you should periodically update your lookup table to the latest copy by hitting “Update IP Lookup Data Store.” The lookup service doesn’t require updating; it does a search with Freegeoip.net each time a new IP address enters your database — the service permits 10,000 calls/hour.