

One of the most common uses of Mautic is for list management and sending marketing emails. That’s not surprising when you consider 70.2% of SMBs with over $1MM in revenue use email for marketing & promotion, according to a a Vocus survey. The respondents rated email as the 2nd most effective digital marketing channel, right after a website presence.
If you’re moving from an email service provider like MailChimp or iContact, the learning curve is not steep. Much like those platforms, Mautic provides a visual editor for you to build, test and deploy your emails. If you have the HTML code for an existing email template, you can even paste it into Mautic’s Code Mode and start sending email right away.
Here is a list of things you should know to better navigate Mautic as an email marketing tool. In this post you’ll learn how to to set up double-opt-in for Mautic, and a basic drip nurturing campaign.
In Mautic, lists are known as Segments.
Many first-time Mautic users are stumped because they can’t find where to manage their subscriber lists. You’ll find them under the Segments menu item. Segments can a) contain email addresses you import manually, b) opt-ins from a form or c) contacts whose data fields meet the criteria of a filter you create when setting up the segment.
Importing a List from Another ESP to Mautic
In earlier versions of Mautic, importing a list was a two stage process – doing the CSV upload itself, then adding the contacts to a segment via a Filter. But if you’re running the latest version of Mautic, you can do it all in the same contact import wizard.
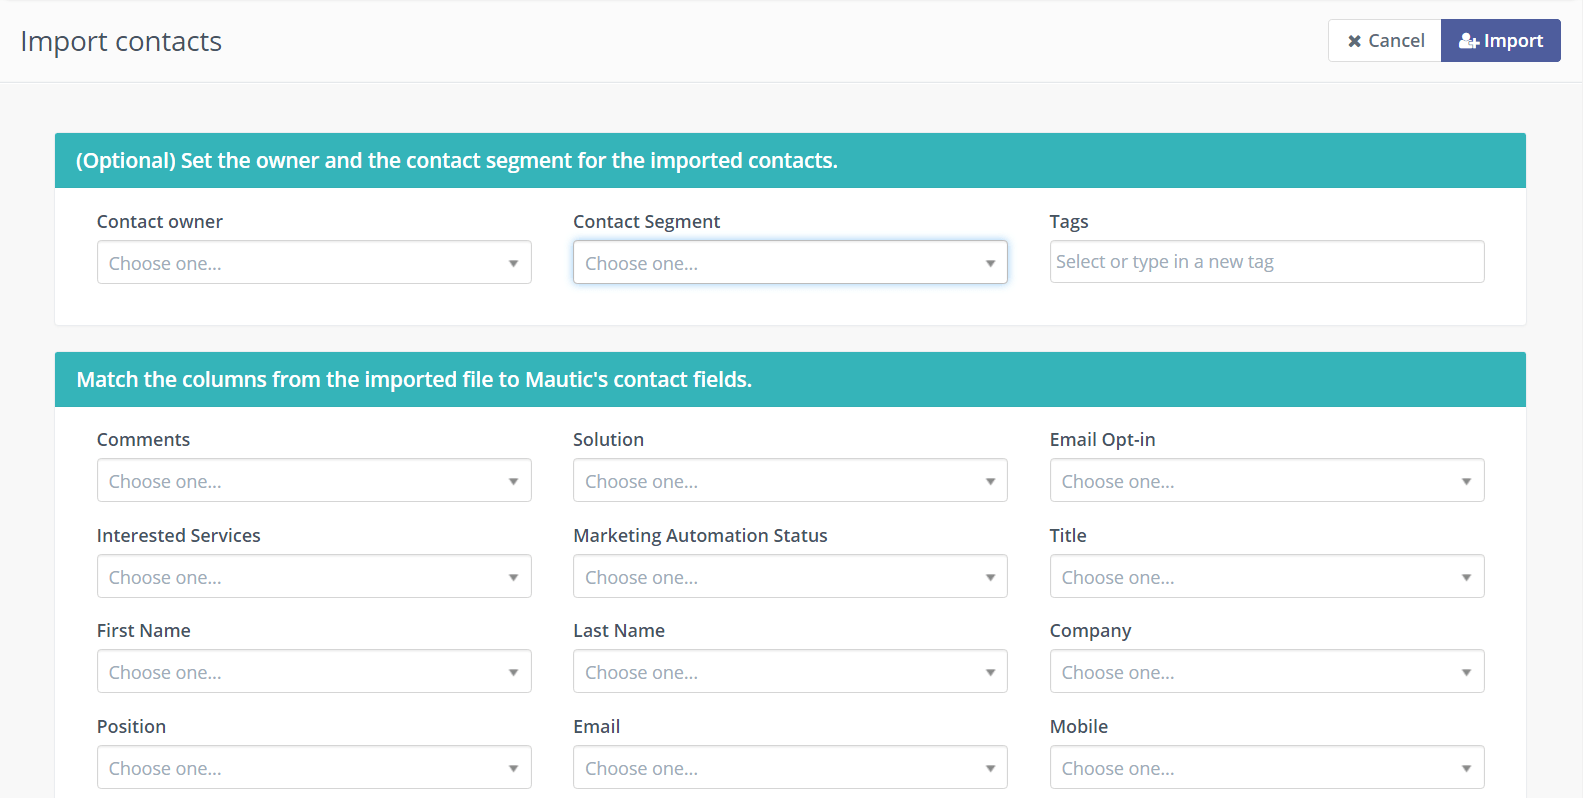
First, you need to go to the Contacts view in the dashboard, click the drop down arrow above the contacts table, and select Import. Select the .CSV file you’d like to import and hit Upload. Next, you’ll be prompted which Contact Segment you’d like to add the newly imported contacts to.
Assuming your .CSV file has a title row with logical labels describing each column of data, simply use the drop down boxes to map them to Mautic fields. If your list has a piece of data that is not captured within one of Mautic’s core fields, simply go to Configuration > Custom Fields and add one.
Once done mapping all your fields, click the blue Import button to confirm and be patient while Mautic works.
Our recommendation would be to create a new segment for each list import, to keep your lists organized. This will be particularly helpful especially if you are importing an older list that might have a higher than usual number of stale email addresses.
Know thy Template vs Segment Emails.
Each time you create a new Email in Mautic, you are asked whether you want to create a Template Email or a Segment Email. If you want to manually send an email to a list, such as a one-off e-blast, you should choose Segment Email option. On the other hand, if you are going to incorporate the email in a campaign, or it’s a trigger email that should be automatically sent after a form completion, it must be a Template Email.
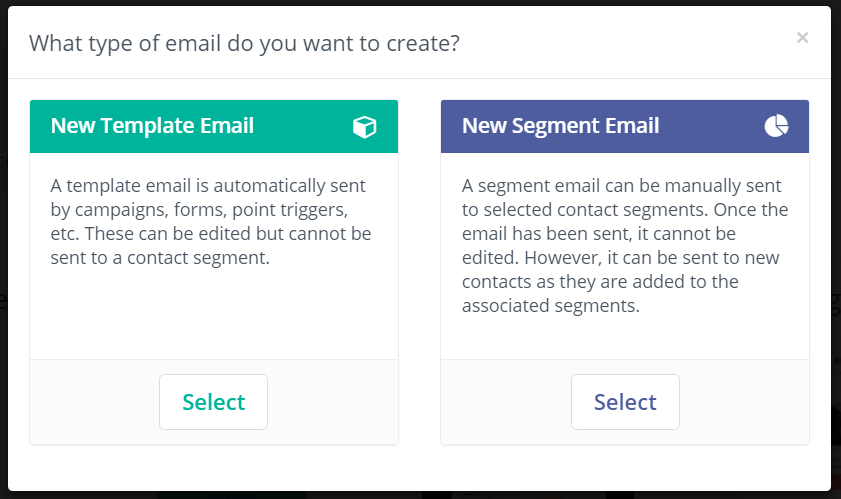
For example, a Mautic email that you are intending to use in a drip campaign should be a Template Email. On the other hand, if you’re sending out an announcement or a monthly newsletter, you might want to use a Segment Email instead.
Need a double opt-in mechanism? Try a Mautic Campaign.
By default, any Mautic contacts are mailable unless they are marked “Do Not Contact”, which includes contacts who have bounced, unsubscribed or have been manually marked that way. Double opt-in means that a user must click a confirmation link in a “welcome” email message before they’ll receive further emails. To distinguish whether a user has confirmed their email yet requires a special setup using a Mautic Campaign.
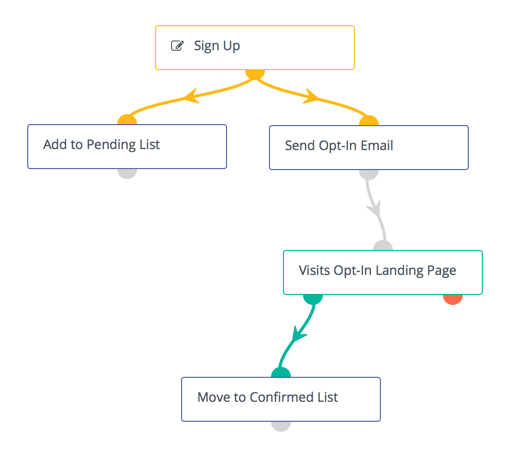
To enable double opt-in, first create two segments: one for your Pending Emails and another for your Confirmed Emails, and create a opt-in confirmation (welcome) Email. Now in the Mautic Campaign where you have specified your opt-in form as the Campaign Source, add two Action blocks:
- Add the contact to the Pending Emails segment
- Send the welcome email containing the confirmation link
Then, on the same branch in the Campaign Builder where the welcome email is sent out, add a Decision block for “Visits a Page.” The URL you specify should be the “Thank you for confirming your email” page connected to the confirmation link in your email. This can be a Mautic-hosted Landing Page, or any page on your website containing the Mautic tracking code.
Finally, under the Decision block should be another Action adding the contact to the Confirmed Emails segment. The structure in the Campaign Builder should look something like this:
How to Set Up a Drip Campaign in Mautic
It’s also very easy to set up a drip campaign in Mautic. For the uninitiated, a drip campaign is a predetermined sequence of emails which will be sent to a contact over time, to educate them about your product or service. Depending on your level of sophistication, a drip campaign can get real complicated in a hurry.
The simplest drip campaign is a series of emails with delay actions in between. First, you need to create all the emails to be sent out as Campaign Emails in Mautic, in the emails pane.

Then, create a new campaign which should look something like this:

- The sample campaign above is set up with the opt-in form as a Contact Source.
- The first action “Add to Sample Drip Campaign Segment” immediately adds the contact to a Segment (list) containing all of the emails enrolled in the drip campaign.
- The other 3 actions “Send Drip Email 1”, “Send Drip Email 2” and “Send Drip Email 3” are actions set up to trigger immediately and after a 3 day and 5 day wait respectively.
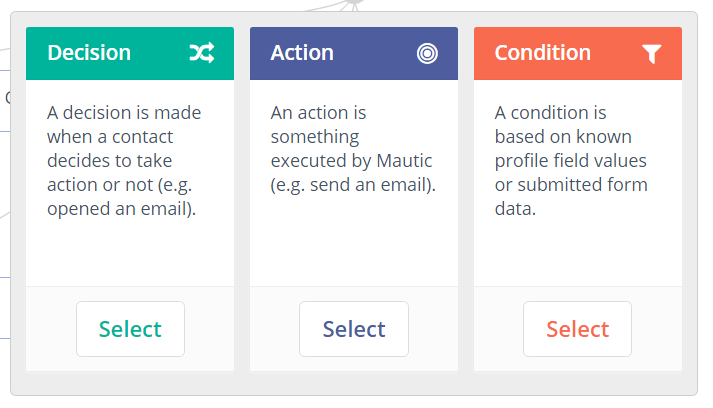 This is the simplest type of drip campaign you can set up, governed only by time-based waits. Feel free to experiment with Mautic’s other features, such as Conditions to send different nurture streams to a prospect based on their contact data, or Decisions that send a special discount to somebody who visits your Pricing page, for example. You could even assign somebody over to a sales user in Mautic, or push them to a CRM such as Salesforce for sales follow-up. Just imagine the possibilities!
2 Comments.
Thanks for this neat info! I was having many problems with Mautic until i found out that my host only allows me to use cron-jobs once per hour. That’s why choosing a “campaign template” email does not work for me.
AND: thanks a lot for making clear that “lists” are “segments”. I saw some older Mautic tutorials from 2015 where they mentioned “lists” all the time and i was unable to find them 😀
Thanks for sharing how to do double opt in, I was looking at that this week.