
Cron jobs are an essential element of the Linux sysadmin’s toolkit. They are the Linux equivalent of “Scheduled Tasks” on Windows Server, and in fact, the existence of cron jobs predates Linux itself, as they are used across all Unix-like operating systems. Usually cron jobs are used to run maintenance tasks on a server, such as sending alerts about system status to the admin, backup data using utilities such as rsync, or process queues for applications.
Cron jobs can automatically run commands/shell scripts at a specified minute, hour, day of month, month, or day of week, and execute recurring jobs at intervals such as every minute, every 5 minutes, or every hour, etc. They are defined either in the system-wide crontab, /etc/crontab, or the user crontab using the crontab command.
By default, the STDOUT (standard output) and STDERR (standard error) of the executables in a cron job are automatically sent to the user’s local mailbox. For example if root executed a cron job, the output would go to /var/mail/root and a Bash message would show up in the terminal saying “You have new mail in /var/mail/root.” Each user’s mailbox is a standard text file which can be viewed using the cat command, or a mail client such as Mutt.
The local mailbox for root can be cleared using the command > /var/mail/root.
Note that the user’s local mailbox is different than an email sent over the network. To read a user’s local mailbox, you must first SSH into the Linux machine as that user – it cannot be checked remotely. As a result, it’s more convenient to send email notifications to the admin using a Mail Transfer Agent (MTA) for conscientious sysadmins who wish to keep tabs on their cron jobs. One of the most popular MTAs for Linux is Postfix.
In this article, we will illustrate how to install Postfix on a CentOS 7 server and configure it to send messages using an SMTP server such as Amazon SES. The reason it’s preferable to send mail from a third-party gateway, instead of directly from the server itself is due to email reputation and IP blacklists. Most messages sent directly from cloud servers are automatically blocked, or flagged as spam, by most incoming mail servers that use blacklists such as Spamhaus. In fact, some cloud providers don’t open the SMTP port 25 at all to prevent abuse.
Using a transactional mail service like Amazon SES, which signs the messages properly with DomainKeys and maintains a sending IP pool with positive IP reputation, will help your alerts reach the inbox successfully.
Step 1 – Install Postfix and related utilities
yum install postfix mailx cyrus-sasl cyrus-sasl-plain
Step 2 – Verify your domain and obtain your Amazon SES key.
Open an Amazon Web Services account at https://aws.amazon.com/ if you do not already have one. Then login to the AWS Management Console and search for Simple Email Service. Verify your domain by adding the required TXT records for verification, updating your SPF record to include SES as an authorized sender, and adding CNAME records pointing to the DKIM public key.
Select the sending domain from the Domains list, and get the API key from “View Details.” The API key should consist of an access key consisting of 20 characters, and a secret key that is 44 characters.
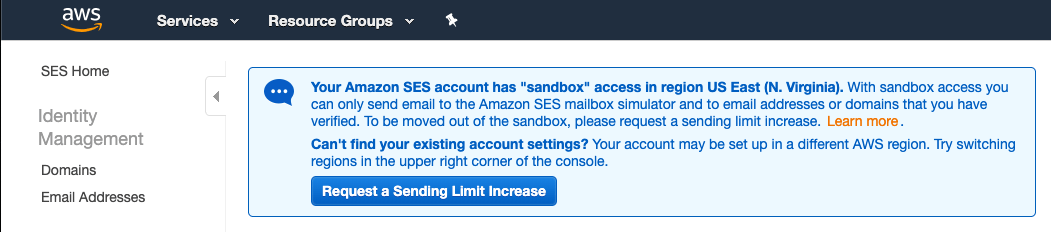
If this is your first time using SES, you should open a ticket with AWS support and request that your account is moved out of the sandbox, and that sending limits are raised. With a ticket, it’s required to provide some brief information about your intended use of SES (to prevent abuse). Inform them you will be sending transactional emails from your server to internal users.
 By default, your Amazon SES service is deployed in the us-east-1 (N. Virginia) region. Should you prefer to send emails from an EU datacenter instead, it’s possible to switch regions by selecting EU (Ireland) from the dropdown in the top right corner of the Management Console. If you do so, you should use the endpoint for that region instead in the next steps.
Step 3 – Create the sasl_passwd file with your email credentials.
nano /etc/postfix/sasl_passwd
[email-smtp.us-east-1.amazonaws.com]:587 A1A1A1A1A1A1A1A1A1AA:Aa0Aa0Aa0Aa0Aa0Aa0Aa0Aa0Aa0Aa0Aa0Aa0Aa0Aa0AA
email-smtp.us-east-1.amazonaws.com is the default endpoint for the us-east-1 region. If you are using Amazon SES in that region, you may leave this value unchanged. 587 is the port number for sending emails securely over TLS, an encrypted connection.
The first part preceding the colon (A1A1A1A1A1A1A1A1A1AA) is the AWS access key, and the second part following the colon (Aa0Aa0Aa0Aa0Aa0Aa0Aa0Aa0Aa0Aa0Aa0Aa0Aa0Aa0AA) is the secret key.
Save and close the file, then lock down its permissions.
chmod 600 /etc/postfix/sasl_passwd
Step 4 – Edit main.cf, the Postfix configuration file
Uncomment (delete the # symbol) & edit the following lines in /etc/postfix/main.cf
myhostname = www.example.com

mydomain = example.com

myorigin = $mydomain

inet_protocols = ipv4

mynetworks_style = host

relayhost = [email-smtp.us-east-1.amazonaws.com]:587
“mydomain” must match the FQDN you verified in Amazon SES previously. Setting the “mynetworks_style” value to “host” is particularly important as it prevents your server from accepting email from unknown hosts, and being abused as an open relay to send spam.
Add the following lines to the end of /etc/postfix/main.cf
smtp_use_tls = yes

smtp_sasl_auth_enable = yes

smtp_sasl_security_options =

smtp_sasl_password_maps = hash:/etc/postfix/sasl_passwd

smtp_tls_CAfile = /etc/ssl/certs/ca-bundle.crt
Step 5 – Hash the password file.
Run the following command at a terminal.
postmap /etc/postfix/sasl_passwd
Step 6 – Enable and start the Postfix service.
systemctl enable postfix
systemctl start postfix
Step 7 – Send a test email to yourself.
mail -s “Test subject” test@example.com
Replace test@example.com with your actual email address to receive the test message. Press enter, type your message (enter for a new line), then use the Ctrl-D key combination to send the message. If you performed the configuration correctly, you should receive the sent message in your inbox.
You may check the status of the email sent through Postfix or diagnose any errors with
systemctl status postfix -l
If you need to make any changes to the configuration, rehash the sasl_passwd file with the postmap command if you modified it, and restart the postfix service.
Step 8 – Enable MAILTO= parameter in crontab.
Add or modify the line MAILTO= at the top of the system-wide and/or user crontabs if applicable.
MAILTO=admin@example.com
nano /etc/crontab to edit the system-wide crontab.
crontab -u <username> -e to edit a user crontab, where <username> is the name of the Unix user without the angled brackets. You must be root to edit crontabs other than your own. If you prefer to use nano as the text editor instead of vi, export the environment variable as follows before editing the crontab.
export EDITOR=nano
You can specify multiple recipients for the email notifications like so:
MAILTO=”admin1@example.com,admin2@example.com”
For any specific cron jobs where you would not like to receive the output by email, add this to the end of the line for that particular job – to output STDOUT and STDERR to /dev/null (discard it).
> /dev/null 1&2
If you followed this guide successfully, you will receive email notifications to your external inbox with the output each time a cron job is run on your system. This can make it simpler to spot problems with scheduled tasks, especially with backups or other critical jobs that you might not realize have failed until it is too late.
If you require any help with configuring cron jobs on your Linux server, or any general Linux system administration task, our team of professional sysadmins is ready to assist you at a reasonable rate – simply drop us a line.