
Like many other marketing automation platforms, Mautic provides a visual editor (also known as WYSIWYG, or “what you see is what you get” editor) to make it easier for marketing users to customize visually appealing landing pages based on landing page templates.
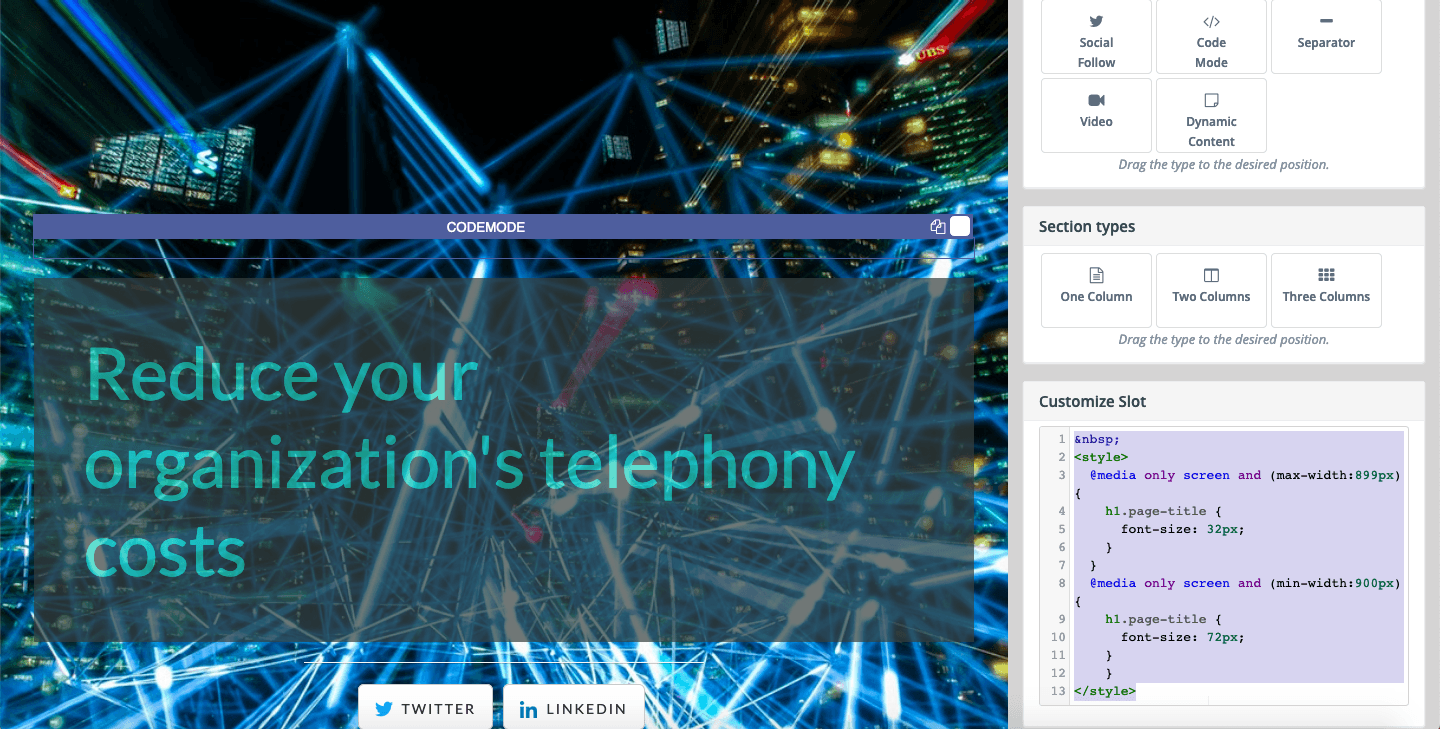
The landing page builder is preconfigured with an assortment of elements, known as Slot types such as Text, Image, Button, Social Share or Follow, Code Mode, Separator, Video, and Dynamic Content. These slots can be drag-and-dropped into sections within the landing page, which range from one to three columns.
Although no coding knowledge is necessarily required to build landing pages using Mautic, having a working knowledge of HTML and CSS can be helpful to customize the pages beyond what is possible through the visual editor.
Using Media Queries to Design Responsive Mautic Landing Pages
Although most Mautic landing page templates come mobile-ready, you may need to use CSS media queries to make individual elements (e.g. headers such as <h1>, <h2>, or images <img src=”…”>) responsive. Media queries instruct the desktop or mobile browser to scale the individual elements to the dimensions of the viewport.
For example, you might want the primary header of the landing page to be displayed with font-size: 72px; when the viewport width is >= 900px (a laptop, desktop, or high-end tablet), and a font-size: 32px; when the viewport width is < 900px (low-end tablet or mobile device).
In order to add a media query to a Mautic landing page, you must add a Code Mode slot before any of the other slots on the landing page. Drag-and-drop a Code Mode slot to the landing page preview of the visual builder. Then on the right sidebar of the visual builder, scroll down to Customize Slot and paste the following code (Tip: Right click or two-finger click the code editor to place the cursor).
The opening (a non-breaking space character) is required to prevent Mautic from deleting the Code Mode slot, which can happen if only in-line CSS code (between the <style></style> tags) is present within the slot.
<style>

@media only screen and (max-width:899px) {

h1.page-title {

font-size: 32px;

}

}

@media only screen and (min-width:900px) {

h1.page-title {

font-size: 72px;

}

}

</style>
Click Apply in the landing page builder, to save your work as you go along.
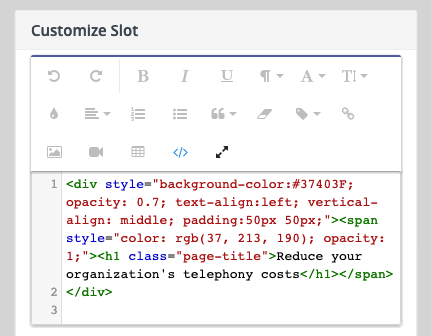
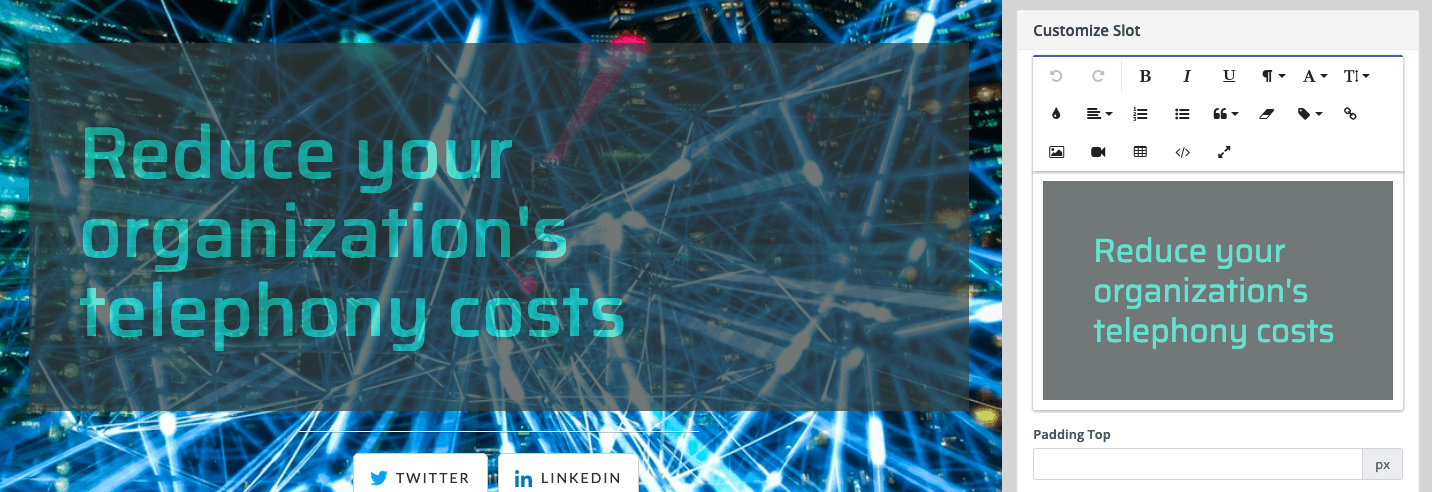
Notice that the media query applies the style to the HTML element h1 with the class page-title – therefore the CSS selector is h1.page-title. In order for the style to take effect, we must now include the class in the <h1> tag for our page header. In the visual builder, hover over and select the Text slot containing the landing page title, in this case Reduce your organization’s telephony costs.
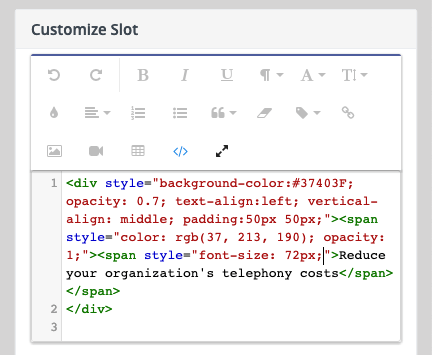
From the right sidebar, scroll down to Customize Slot and change to Code View by clicking the toolbar symbol </>.
Before adding the page-title class to the h1 tag, notice that the font-size property of the page header is currently hard coded to 72px, regardless of the size of the viewport. Remove that <span></span> tag around Reduce your organization’s telephony costs before proceeding.
Next, add a <h1></h1> tag around Reduce your organization’s telephony costs with the class, page-title. The opening tag should look like <h1 class=”page-title”>. Remember to click the </> button on the toolbar to close the Code View before clicking Apply to save your changes.
Now preview the page on a mobile device again, and you should notice that the word “Organization” is no longer cut-off on the right-hand side of the page, since the font size is reduced to 32px by the media query, when on a mobile device.


Embedding Google Fonts on a Mautic Landing Page
So far, our landing page looks much better with the media query in place, but the page header is looking a little bit bland with the default Lato font – inherited from the stylesheet of the landing page template. Google Fonts is an excellent resource for free web fonts, and you can browse them here.
We chose the Google Font called Saira.
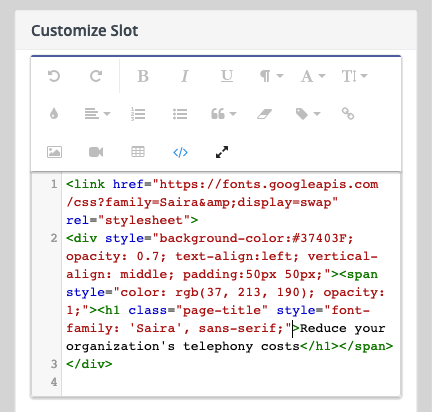
Click Select this Font on the Google Fonts browser, then click 1 Family Selected to expand the window displaying the embed code for the font.
<link href="https://fonts.googleapis.com/css?family=Saira&display=swap" rel="stylesheet">
In the Mautic landing page builder, customize the Text slot containing our page header in the Code View, and copy & paste the above Google Font code into the slot. Also, add the style attribute to the h1.page-title HTML tag with the desired font-family property. When finished, your code should look like this.
Leave the Code View by clicking the </> toolbar button, then click Apply to save your changes, and preview the page.
Absolute Positioning a Header Logo on a Mautic Landing Page
In this tutorial, we will make one more customization before completing our Mautic landing page. You may have noticed that the landing page does not have a company logo so far. You could use the Image slot provided by Mautic to insert the logo onto the page, but that does not give you the flexibility to position the logo closer to the top of the page.
Instead, we will use a Code Mode slot to accomplish this.
But first, upload the logo onto the Mautic server by using the File Manager. Click on any of the existing Text slots displayed on the page and scroll down to Customize slot. Then, click the Insert Image toolbar icon, then the Folder icon to launch the File Manager.

In the File Manager window, select Upload in the upper right-hand corner and select the logo image from your desktop. Then, click Upload to confirm.
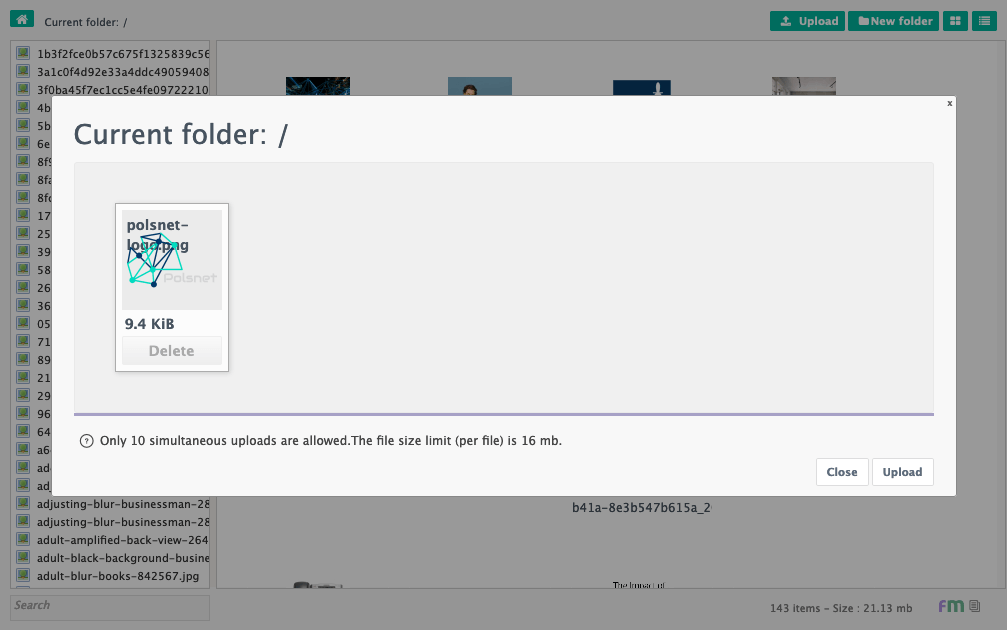
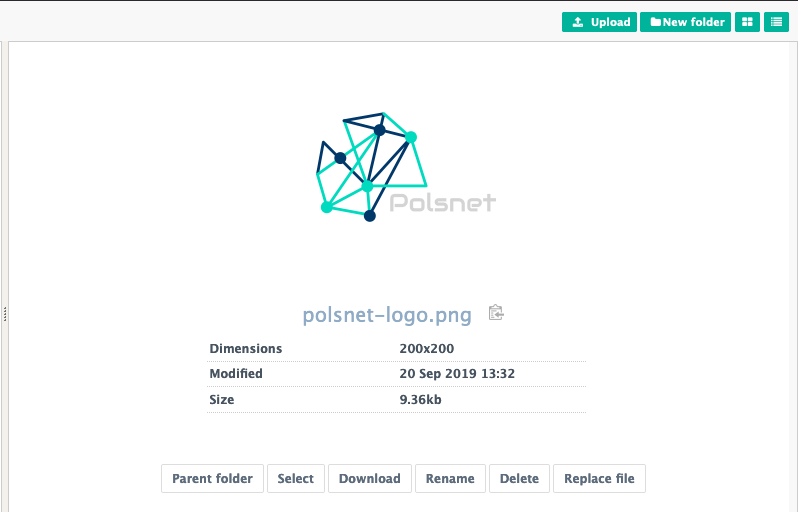
Browse for the logo in the File Manager and click the clipboard icon to Copy URL to Clipboard, which should be something like /media/images/polsnet-logo.png.
Drag-and-drop a Code Mode slot onto the landing page builder, above the Code Mode slot containing the media query, and the header Text slot.
The position: absolute; CSS property indicates that you want to specify a position for this img element based on the containing parent element with relative position. The top and left values specify how many pixels the image should be offset from the parent element, and z-index with a high number such as 999 forces the element to be on-top of any other elements.
<img style="position:absolute; top:0; left:50px; width:120px; z-index:999;" src="https://mautic.example.com/media/images/polsnet-logo.png">
Click Apply to save the changes.
![]()