Minio is a S3 compatible object storage server which can be run with a variety of storage backends, including NFS, GlusterFS, and other distributed storage or cloud storage backends. You can opt for multiple load-balanced Minio servers against a single storage backend, or multiple Minio servers with data spanned across multiple drives – with erasure coding. If your applications consume S3 object storage but you don’t wish to use Amazon S3, typically because your architecture is hosted in a public or private cloud outside of AWS, Minio might be the right solution.
A Minio server, or a load balancer in front of multiple Minio servers, serves as a S3 endpoint that any application requiring S3 compatible object storage can consume. One common use case of Minio is as a gateway to other non-Amazon object storage services, such as Azure Blob Storage, Google Cloud Storage, or BackBlaze B2.
Using Minio as a gateway to BackBlaze B2 is particularly popular because of BackBlaze’s low per-gigabyte storage cost ($0.005/GB/mo) and membership in the CloudFlare-led Bandwidth Alliance. Because of this unique agreement, any static assets stored in a BackBlaze B2 bucket can be served over the CloudFlare CDN using a CNAME record, with no egress bandwidth costs billed to the B2 bucket owner.
Popular open-source applications that consume S3 compatible cloud storage include media storage for WordPress or RocketChat. Note that however using BackBlaze B2 through Minio as primary or external storage for NextCloud is no longer supported, as NextCloud version 14 and above use a MultipartUpload S3 API call which is translated to an a large file upload API call that the B2 API requires at least 2 parts for. Facilitating the separation of concerns between user data and application code is a simple way to make conventional apps more “cloud native.”
Minio is backed by Docker alumni including Steve Singh, former CEO of Docker, Inc. so it’s not a surprise that Minio runs as a Docker container. The container image is available on the Docker Hub at minio/minio.
This article will describe how to set up Minio as a S3 to B2 gateway and use the s3cmd command line tool to interact with the BackBlaze B2 bucket using Amazon S3 commands. If you require consulting or support with using Minio as part of your cloud architecture, please contact our Minio consultants.
It assumes that you want to set up a single Minio container on localhost mapped to the BackBlaze B2 cloud storage service. Setting up on localhost means that its safe to connect to the Minio endpoint, in the below example localhost:9001 without SSL from applications hosted on the same server.
Configuring Minio on the Server-Side Using Minio Docker Container
The Minio access key and secret key should be identical to your B2 access and secret key, which you can obtain from the App Keys section of the dashboard after you sign in to your B2 Cloud Storage account.
The named volume, minio-data, is used to persist Minio’s configuration and application data (such as authentication tokens) when the container is redeployed.
docker volume create minio-data
docker run -d --name b2-s3 --restart on-failure -p 127.0.0.1:9001:9000 -v minio-data:/data -e "MINIO_ACCESS_KEY=1111111111111111111111111" -e "MINIO_SECRET_KEY=AAAAAAAAAAAAAAAAAAAAAAAAAAAAAAA" minio/minio gateway b2
With a few minor changes to the docker run command, it’s also possible to set up Minio in gateway mode with Azure Blob Storage or Google Cloud Storage, by passing the respective credentials for these services.
docker volume create minio-data
docker run -d --name azure-s3 --restart on-failure -p 127.0.0.1:9001:9000 -v minio-data:/data -e "MINIO_ACCESS_KEY=azurestorageaccountname" -e "MINIO_SECRET_KEY=azurestorageaccountkey" minio/minio gateway azure
docker volume create minio-data
docker run -d --name gcs-s3 --restart on-failure -p 127.0.0.1:9001:9000 \

-v minio-data:/data

-v /path/to/credentials.json:/credentials.json \

-e "GOOGLE_APPLICATION_CREDENTIALS=/credentials.json" \

-e "MINIO_ACCESS_KEY=minioaccountname" \

-e "MINIO_SECRET_KEY=minioaccountkey" \

minio/minio gateway gcs yourprojectid
docker volume create minio-data
docker run --name nas-s3 --restart on-failure -p 127.0.0.1:9001:9000  \

-v minio-data:/data \

-v /shared/nasvol:/container/vol \

-e "MINIO_ACCESS_KEY=minio" \

-e "MINIO_SECRET_KEY=minio123" \

minio/minio gateway nas /container/vol
If you wish to connect to your Minio gateway over an untrusted network such as the open Internet, you would certainly need to set up a TLS reverse proxy (such as nginx) with a valid SSL certificate to prevent the data from being intercepted in-transit. You could use a free certificate authority, such as Let’s Encrypt, to obtain the certificate.
Setting up a reverse proxy also has the benefit of allowing you to securely access Minio’s web interface from a browser, so that you can browse, upload, download, and delete files from the Minio backend in just a few clicks.
Install nginx from your package manager, either sudo apt install nginx (for Ubuntu) or sudo yum install epel-release && sudo yum update && yum install nginx (for CentOS).
Enable and start the nginx service, sudo systemctl enable nginx && sudo systemctl start nginx.
Also, get the Certbot client for your distro, sudo add-apt-repository ppa:certbot/certbot && sudo apt-get update && sudo apt-get install certbot python-certbot-nginx (for Ubuntu) or sudo yum install certbot python2-certbot-nginx (for CentOS).
Create an A record pointing the fully qualified domain name (FQDN) for your Minio endpoint to the IP address of your Minio server. Then, run the following command to obtain a certificate, where minio.example.com is your domain or subdomain.
sudo certbot certonly --webroot -w /usr/share/nginx/html -d minio.example.com
Provide an email address for renewal reminders (you shouldn’t get any if automatic renewal is set up correctly in a later step) and agree to the Let’s Encrypt TOS. If you did everything correctly so far, you should have a valid certificate and private key located at /etc/letsencrypt/live/minio.example.com/fullchain.pem and /etc/letsencrypt/live/minio.example.com/privkey.pem respectively.
Now go to the directory where configuration files for Nginx are stored (/etc/nginx/sites-available/ for Ubuntu, /etc/nginx/conf.d/ for CentOS), and create a new configuration file called minio.conf.
This configuration forces all connections to the Minio endpoint to use HTTPS, it sets the client_max_body_size value to 0 so objects of an unlimited size can be uploaded, and the client and proxy timeouts are set to high values so larger uploaded chunks don’t time out. It also implements the recommendations by Cipherli.st to earn an A on Qualys SSL Test (A+ if HSTS is enabled).
server {

listen 80;

listen [::]:80;

server_name minio.example.com;
location /.well-known {
alias /usr/share/nginx/html/.well-known;
}
location / {
# enforce https
return 301 https://$server_name:443$request_uri;
}
}
server {
listen 443 ssl http2;
listen [::]:443 ssl http2;
server_name minio.example.com;
ssl_certificate /etc/letsencrypt/live/minio.example.com/fullchain.pem;
ssl_certificate_key /etc/letsencrypt/live/minio.example.com/privkey.pem;
ssl_protocols TLSv1.2;
ssl_prefer_server_ciphers on;
ssl_dhparam /etc/nginx/dhparam.pem;
ssl_ciphers EECDH+AESGCM:EDH+AESGCM;
ssl_ecdh_curve secp384r1;
ssl_session_timeout 10m;
ssl_session_cache shared:SSL:10m;
ssl_session_tickets off;
ssl_stapling on;
ssl_stapling_verify on;
resolver 1.1.1.1 1.0.0.1 valid=300s;
resolver_timeout 5s;
# add_header Strict-Transport-Security "max-age=15768000; includeSubDomains; preload;";
fastcgi_hide_header X-Powered-By;
client_max_body_size 0;
client_header_timeout 60;
client_body_timeout 86400;
fastcgi_read_timeout 86400;
proxy_connect_timeout 60;
proxy_read_timeout 86400;
proxy_send_timeout 86400;
send_timeout 86400;
location / {
proxy_set_header Host $http_host;
proxy_set_header X-Real-IP $remote_addr;
proxy_set_header X-Forwarded-Proto $scheme;
proxy_pass http://minio;
}
}
If using Ubuntu, create a symlink from the sites-enabled folder, like so, cd /etc/nginx/sites-enabled && ln -s /etc/nginx/sites-available/minio.conf minio.conf to enable the config.
Generate the dhparam.pem file for Nginx using this OpenSSL command. This ensures a secure TLS connection with randomly generated Diffie-Hellman values.
openssl dhparam -out /etc/nginx/dhparam.pem 4096
Test the config with the nginx -t command, and if there are no errors, you’re good to restart the Nginx service to have the changes take effect.
sudo systemctl restart nginx
As root, add the following line to the system-wide crontab, /etc/crontab, to facilitate certificate renewal. Test whether the renewal would succeed by running certbot renew --dry-run at the terminal.
0 2 * * * root certbot renew > /dev/null 2>&1
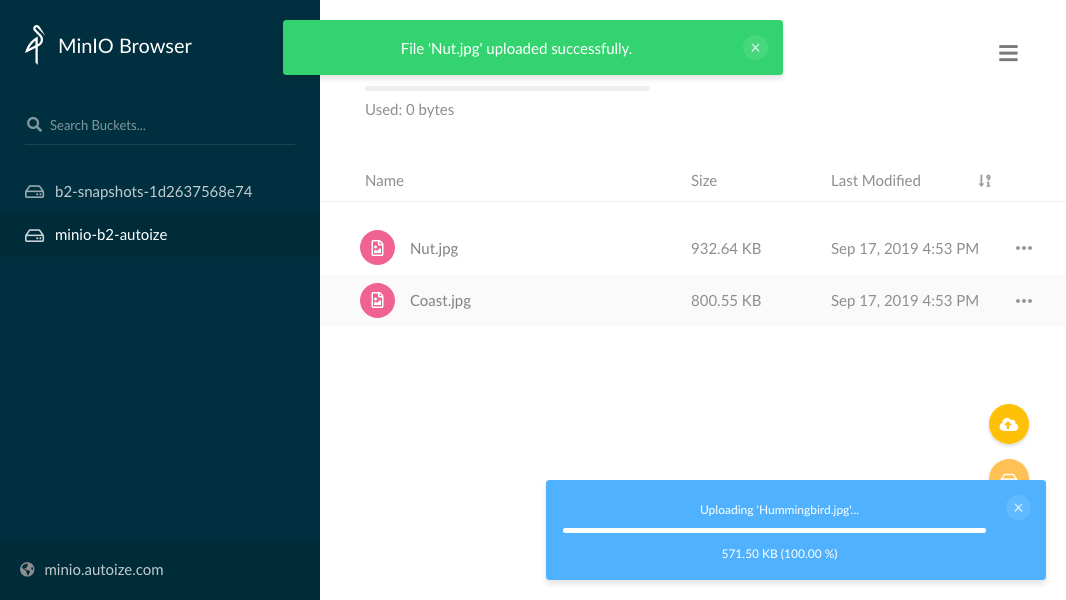
Visit minio.example.com in any web browser, provide the access and secret keys, and you will be redirected to the Minio Browser where you create new buckets, list the contents of buckets, put (upload), get (download), and delete objects.
Configuring s3cmd client to connect to Minio
Install the s3cmd client, a command line based tool which can be used to access any S3 compatible endpoint, including Minio endpoints.
Ubuntu: sudo apt install s3cmd
CentOS: sudo yum install s3cmd
Create the configuration file in your home directory, ~/.s3cfg
If accessing a Minio endpoint, the bucket_location (i.e. region) should typically be blank. Even if you are accessing a cloud storage service on the backend where a region is designated (e.g. us-east-1), Minio itself is regionless.
The access_key and secret_key should correspond to the MINIO_ACCESS_KEY and MINIO_SECRET_KEY environment variables specified when starting the Minio container. If using Minio as a gateway for an external cloud storage service, these keys should correspond to the credentials issued by that service.
If using Minio with NAS, the access and secret keys may correspond to a specific Minio user created through the mc admin create user command. Creating a Minio user through the Minio Client tool allows you to assign a unique access key by user, so their privileges can be limited by a custom or canned policy, defined in a JSON format compatible with AWS IAM permissions for S3 (e.g. writeonly, readonly, readwrite).
# Setup endpoint

host_base = minio.example.com

host_bucket = bucket-name

bucket_location =

use_https = True

# Setup access keys

access_key = 1111111111111111111111111

secret_key = AAAAAAAAAAAAAAAAAAAAAAAAAAAAAAA

# Enable S3 v4 signature APIs

signature_v2 = False
Now you can list the buckets and their contents, put, get, and delete objects on the underlying NAS or cloud storage service through Minio using the following S3 commands.
List buckets: s3cmd ls s3://
Create bucket: s3cmd mb s3://bucket-name
List bucket contents: s3cmd ls s3://bucket-name
Put object to bucket: s3cmd -v put /path/to/local_file.bin s3://bucket-name/remote_file.bin --multipart-chunk-size-mb=15
Get object from bucket: s3cmd -v get s3://bucket-name/remote_file.bin /path/to/local_file.bin
Remove object from bucket: s3cmd rm s3://bucket-name/remote_file.bin
Connecting a Web Application such as RocketChat to Minio
Below is an example of how RocketChat can be connected to a Minio server, which uses Backblaze B2 as backend storage. Note that the “Force Path Style” option should always be enabled, as your Nginx load balancer is not set up to resolve the subdomains of the bucket names. Therefore you want your application to put/get objects at https://minio.example.com/bucket-name (path style enabled), not https://bucket-name.minio.example.com (path style disabled).